Sunday, June 29, 2014

Practical Certificate Knowledge for .NET developers: HttpWebRequest Client Certificate Authentication

HttpWebRequest Client Certificate Authentication

Articles in this series:

Introduction

Finally, some C# code! This post builds upon part four, where we use an HttpWebRequest object to contact our web page. This example can be practically used when invoking REST-style HTTP services that use client certificate authentication. 

Sample Code

Copy and paste more easily from here (dotnet fiddle link).

In a new console app, use the following code, but be sure to update the port to match what you used in Part Four.

Additionally, you will need to import the MyClientCert.pfx file into the local computer's personal certificate store. In order to do this, follow Part Four, Step 3, but rather than selecting your user's certificate store, select the local computer's certificate store. 

Go ahead and run this code, and you should see the contents of your HTML file dumped out to the console. Note however, though, if you remove the association line request.ClientCertificates = collection; and re-execute the program, you'll get a 403 Forbidden error, since you aren't passing in the certificate required for the request. 

The code below is commented to walk through what is actually happening. Do note that when working with X509 certificates in .NET, you'll want to utilize the X509Certificate2 classes (not the X509Certificate classes), as the '2' classes are a newer, more fully featured class to handle X509 certs in code. 

using System.IO;
using System.Net;
using System.Security.Cryptography.X509Certificates;

namespace ClientCertInvocation
{
    class Program
    {
        static void Main(string[] args)
        {
            // Create a web request that points to our SSL-enabled client certificate required web site
            HttpWebRequest request = (HttpWebRequest)HttpWebRequest.Create("https://my.local.machine:440/");

            // Use the X509Store class to get a handle to the local certificate stores. "My" is the "Personal" store.
            X509Store store = new X509Store(StoreName.My, StoreLocation.LocalMachine);

            // Open the store to be able to read from it.
            store.Open(OpenFlags.ReadOnly); 

            // Use the X509Certificate2Collection class to get a list of certificates that match our criteria (in this case, we should only pull back one).
            X509Certificate2Collection collection = store.Certificates.Find(X509FindType.FindBySubjectName, "MyClientCert", true);

            // Associate the certificates with the request
            request.ClientCertificates = collection;

            // Make the web request
            HttpWebResponse response = (HttpWebResponse)request.GetResponse();

            // Output the stream to a file.
            Stream stream = response.GetResponseStream();
            using (var fileStream = File.Create("copy.html"))
            {
                stream.CopyTo(fileStream);
            }
        }
    }
}

Sunday, June 22, 2014

The Next Internet Land Rush

The Next Internet Land Rush 

The next internet land rush is upon us. Soon, you will see URLs like pepperoni.pizza or chicago.map, and possibly even fries.mcdonalds. 

How is this possible? A few years ago, ICANN, the organization that coordinates the internet's top level domain system, opened up the ability to apply for the creation of new generic top level domains (gTLDs). The most common TLD that exists today is .com, though .net, .org, .edu, and others are likely also be familiar to you. But now, it's possible to have many, many more. New generic top level domains (like .technology) have been rapidly being released in the past few years, and over 600+ are planned overall, with an application process in place to create even more.

The dwindling focus on .com


Here are there reasons you might decide to go with a new gTLD over .com. 

Availability - The biggest issue today with .com is that most desirable domain names are taken. People looking for a web address are finding it challenging to find a friendly domain name that is succinct, memorable, and retains their branding. This is where the new gTLDs shine. With new domains like .florist, .music, and .bar, whether you're a small business owner or a musical artist, you have a new opportunity to register a much more meaningful domain name for yourself, or something more memorable and clever, (which I am hoping tarun.talks.technology is, of course).

Searching - The way we use the internet now already lends itself to be friendly to the new top level domain names. Rarely do users know a URL directly, instead, they tend to leverage search engines to find the content they're looking for. Users won't necessarily even pay enough attention to the URL of the site they're visiting, and instead would rely on search engines to find that page again if they need it in the future. This would be contingent on search engines starting to index and rank pages on these new gTLDs along with .com, however. 

Social - Additionally, for certain types of sites, direct to homepage traffic can be low versus referrals from search engines and social media link sharing. How you raise awareness of your content via social media and search engine optimization can be a larger traffic driver rather than distinctly raising brand awareness. In a lot of cases your homepage can be used to share your brand messaging rather than a launch point to access all of your content. Many users click links via Facebook or Twitter to visit an article than ever go to a site's homepage (How many buzzfeed articles have you read - and how many were accessed from their homepage?).

So what new top level domains are available, and when?

You can see a current list of all available domain names today on Wikipedia. These can all be priced differently, and you should check a domain registrar like namecheap, godaddy, or many others (just use your favorite search engine to look for a domain registrar) to see what they might cost. Anything marked as an Open TLD you can feel free to register for any purpose, but some might be more restrictive (for example, you must provide validation for .travel as being a travel-related entity, like a travel agency). 

Additionally, there are plenty of domains that are still going through an approval process. You can check out this nicely laid out diary page from onlydomains or this exploration page from namecheap to see when shortly upcoming domains will be released, and other registrars have similar lists, and some even offering to send you an email when certain tlds open up. You can even visit the New Generic TLD page from ICANN, which has a considerable amount of detail about tlds going through the application process.


Sunrise and Land Rush Periods

Once a new generic top level domain is approved, a 60-day sunrise period occurs where only entities that hold a trademarks for a brands are able to register for their brand name, so if you were thinking you could get rich by snagging apple.tech before Apple does, sorry, that's pretty unlikely. 

After the sunrise period, a land rush period occurs. This is the first time a TLD is open to the public. During this period, a premium may be charged to register anything on a TLD. If you wait until after the land rush period, prices may come down, so it's your choice as to wonder whether is.fly will last through the land rush period and wait for a cheaper price, or pay a premium to beat someone else to the punch. 

Good luck in the new TLD land rush - the most clever new domain name wins!

Sunday, June 15, 2014

Practical Certificate Knowledge for .NET developers: Client Certificates: IIS Setup

Client Certificates: IIS Setup

This week we're going to look at setting up a website in IIS that requires client certificate authentication to access. You'll need to have gone through at least parts two and three in order to follow along with this post. 


Introduction

Client certificates are commonly used to authenticate a client with a service provider. Typically the client will generate the client certificate, as it is required for the client to hold on to the private key. The client will pass the public key to the service provider, who will configure their service to accept and trust that public key, while typically mapping that public key to a particular user on the server side. Client certificates can be generated on your own or purchased through a generally trusted certificate authority. 

In this post, we'll be generating a client certificate signed by your root certificate and configuring the SSL site you set up in part three to associate that client certificate with a user on your system, as well as explore the IIS option to disallow, accept, or require a client certificate on connection.

Lastly, we'll validate that we've set up our site properly by visiting your local SSL-enabled site in a browser and ensuring that the client certificate gets passed properly.

Step 1: Validate your existing setup

If you've been following the previous posts, ensure that:
  1. Your MyRootCert.cer file has been imported to the Trusted Root Certification Authorities of both your user and local computer stores.
  2. That your my.local.machine certificate has been imported into the local computer's personal store.
  3. That your SSLSite web site has been set up in IIS properly with an HTTPS binding and is accessible by hitting https://my.local.machine:port/ with no certificate errors.
Step 2: Generate your client certificate

Open up a command prompt and navigate to the certificate directory you've been working in and run the following command:

makecert.exe -iv MyRootCert.pvk -ic MyRootCert.cer -n CN=MyClientCert -len 2048 -pe -sv MyClientCert.pvk -sky exchange -b 01/21/2010 -e 01/21/2020 MyClientCert -eku 1.3.6.1.5.5.7.3.2

The only difference in the command here vs the server certificates we've been generating is the -eku parameter, which is set to the value to specify a client certificate.

Once again, you'll be prompted to set a password for your client cert's private key (I did not, but you should for a production environment), and asked for MyRootCert's private key password in order to sign the client cert (which I had set to 'learning'). 

Next, run pvk2pfx.exe in order to generate MyClientCert.pfx:

pvk2pfx.exe -pvk MyClientCert.pvk -spc MyClientCert.cer -pfx MyClientCert.pfx

Step 3: Import your client certificate into your user's personal certificate store.

Now open up your Microsoft Management Console (Win+Rmmc, <Enter>) and add the certificate snap-in by going to File->Add/Remove Snap-In. Click on 'Certificates' in the left panel, then click add. Add the snap in for your current user.

Now import the MyClientCert.pfx file into your current user's personal certificate store, but ensure you mark the certificate as exportable, as shown:


Ensure the middle and last checkboxes are checked.


Step 4: Getting the base64 encoded certificate

In order to set up IIS, you'll need the base64 encoded version of the public key certificate. Take the following steps:


Right click on MyClientCert in the Current User's Personal Certificate Store, go to All Tasks->Export

Click 'Next'

No, do not export the private key

Select 'Base-64 encoded X.509'

Finish up the wizard and name the certificate MyClientCertBase64.cer

Now head to the directory where MyClientCertBase64.cer is, and open it in a text editor. You should see something like this, but the string will be different:


We'll do something with this further down.


Step 5: IIS Enhancement

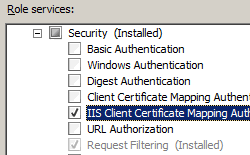
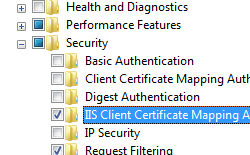
Follow the instructions in IIS Client Certificate Mapping Authentication under 'setup' to install the support in IIS for client certificate mapping, replicated below for your convenience, which adds support for client certificate mapping. The linked page is worth reading, as it also explains the parameters we are going to set up in Step 6.

WINDOWS SERVER 2008 OR WINDOWS SERVER 2008 R2
  1. On the taskbar, click Start, point to Administrative Tools, and then click Server Manager.
  2. In the Server Manager hierarchy pane, expand Roles, and then click Web Server (IIS).
  3. In the Web Server (IIS) pane, scroll to the Role Services section, and then click Add Role Services.
  4. On the Select Role Services page of the Add Role Services Wizard, select IIS Client Certificate Mapping Authentication, and then click Next.
  5. On the Confirm Installation Selections page, click Install.
  6. On the Results page, click Close.

WINDOWS VISTA OR WINDOWS 7

  1. On the taskbar, click Start, and then click Control Panel.
  2. In Control Panel, click Programs and Features, and then click Turn Windows Features on or off.
  3. Expand Internet Information Services, then select IIS Client Certificate Mapping Authentication, and then click OK.
Step 6: IIS Configuration

In IIS, select your SSL site, then click on configuration editor:


You should see something similar to the following after setting 'Section' to 'system.webServer/security/authentication/iisClientCertificateMappingAuthentication'.


Now enter the following values:
Sectionsystem.webServer/security/authentication/iisClientCertificateMappingAuthentication : This sets the section of the configuration we are going to edit, pulled from the documentation site linked here.
From: ApplicationHost.config <location path='SSLSite'/> - sets the config file to edit.
enabled: True - turns on client certificate mapping authentication
logonMethod: ClearText - descriptions of the different types are in the documentation.

Ensure oneToOneCertificateMappingsEnabled is assigned to true, then click on the 'oneToOneMappings' row and click on the ... button that appears on the end of the row.

You should see a screen like:


This is the screen that lets you input a client certificate and map it to a single user. Click 'Add' on the right, and for the new user, set 'enabled' to 'true', and input the username and password of the windows user you want to be associated to your certificate (this can be the same logon you are currently using on your machine). 

For the certificate, head back to your MyClientCertBase64.cer file. open this in a text file, remove the very first line (-----BEGIN CERTIFICATE-----) and the very last line (-----END CERTIFICATE-----) and collapse the base64 encoded representation of your certificate to a single line. Copy and paste this line into the certificate field. Your window should look something like:


Close the window, and you should now see a Count=1 next to your oneToOneMappings line in the configuration edit. Click 'Apply' on the top right. 

Click back on your SSL site to return to the following view and click 'SSL Settings'.


Check the 'Require SSL' box, then check 'Require' under 'Client Certificates', then 'Apply' on the top right. Note the other options here, and note that you can only pass in a client cert if you've got an SSL connection established to the server.


IIS Should be all set up now.

Step 7: Validating you need the cert to access the site.

Before you try to connect to your site in a browser, open up IE. Press F10 if you can't see the menu bar, then click tools, internet options, click on the security tab, click 'local intranet', and click 'custom level'. Under 'Miscellaneous', select 'Disable' for "Don't prompt for client certificate selection when only one certificate exists."

This will ensure you'll get a popup asking you which cert to pass to the server, validating that the server is asking for your cert.

Click OK to save your custom level settings, then OK to save your internet options. 

Access your site via IE by going to https://my.local.machine:port/ (remember, port is what you set up in Part 3 in your site bindings). 

You should be prompted to supply your client certificate, but if not, click File->Properties to ensure that you changed your security settings for the correct zone that IE detects your site in.

If everything works properly, you should see:


And once you click OK, you should see your site content, successfully having presented the certificate:

As an exercise, you can feel free to remove MyClientCert from your Personal Store temporarily to see what comes up when you try to access your site again, proving that the cert is required to access the site (be sure it re-import MyClientCert.pfx afterwards, as we'll likely re-use this cert in subsequent posts).


There are quite a few additional settings in IIS for mapping client certs. Feel free to read over the documentation and understand the settings yourself in order to learn more.

Step 8: Validating you're logging in as the correct user


Let's ensure now that you're actually hitting the site as the logged in user. Open up IIS Manager, click on SSL site, and double click on Logging. Ensure your format is set to W3C, and click on 'Select Fields', ensuring that cs-username is selected. Click OK to save and close the select fields box, and note the directory of the logs. Open up the log directory and find the logs for SSLSite. Open up the latest ones, and you should see the username you configured inside the logs (mine is tchawla), whereas if you look at old logs, a - would be present for the username instead.


Conclusion

That's it for this post. Keep your certificates and setup around, as eventually I want to get into explaining how to call into web services that are hosted on this site and passing in the client cert via .NET code.

Sunday, June 8, 2014

Practical Certificate Knowledge for .NET developers: Setting Up SSL Locally

Setting Up SSL Locally

Last week's post was on generating your own certificates. This week we're going to look at setting up SSL locally. You will need to have gone through at least Part Two for this, and an upcoming posts about client certificates will require this post as a prerequisite.


There are a few different ways to do this, and I'm going to take the approach of generating a certificate on your own, importing to the proper certificate stores, and binding it to a web site yourself. This way you'll learn where these certificates live. You can also generate SSL certs directly inside of IIS if you'd like.

Step 1: Trusting Your Root Certificate

If you have not run through part two yet or you removed your MyRootCert.cer from your user's Trusted Root Certification Authorities folder, go ahead and re-import it again. Steps to do this in are in part two under 'Trusting the Root Certificate'.

Step 2: Generating Your SSL Certificate

If you went through part two, you already generated an SSL certificate (MySecondCert.cer). An SSL certificate is nothing more than a certificate with an extended key usage field set to server authentication. In our example today we'll work with a new cert signed by your MyRootCert's private key, which you can generate using the following command. Ensure you run this command from the folder where you kept makecert.exe and MyRootCert.cer and MyRootCert.pvk. This command is identical to the MySecondCert generation command from part two, only with different filenames for the .cer and .pvk file, and a different subject name.


makecert.exe -iv MyRootCert.pvk -ic MyRootCert.cer -n CN=my.local.machine -len 2048 -pe -sv my.local.machine.pvk -sky exchange -b 01/21/2010 -e 01/21/2020 my.local.machine.cer -eku 1.3.6.1.5.5.7.3.1

First you'll be asked to set a password for the new cert you'll be generating. You can if you would like, but in my case, I did not by pressing the 'None' button since this is not for a production system.

my.local.machine.pvk's password setting (I did not set one by clicking None)

Next you'll be asked for your password for the signing cert (in our case, MyRootCert). Last week we had set this to 'learning'. Remember that the certificate being created is being signed by MyRootCert's private key (the MyRootCert.pvk file), which is why you get prompted for MyRootCert.pvk's password.

Request for the MyRootCert.pvk password in order to use it to sign the new certificate.

After the command completes, you should see the my.local.machine.cer and my.local.machine.pvk file in your directory.

Step 3: Generating the my.local.machine.pfx file

In order to set up an SSL site, we'll need a .pfx file to import into the local computer's personal certificate store. Just like last post, use the pvk2pfx.exe program to generate this.

pvk2pfx.exe -pvk my.local.machine.pvk -spc my.local.machine.cer -pfx my.local.machine.pfx

You should now see the my.local.machine.pfx file in your directory.

Step 4: Importing the certificate and private key 

Now open up your Microsoft Management Console (Win+R, mmc, <Enter>) and add the certificate snap-in by going to File->Add/Remove Snap-In. Click on 'Certificates' in the left panel, then click add. This time, we'll want to add in the certificates snap in for the local machine, as follows:

Select 'Computer account' and click Next.
Select 'Local computer' and click Finish

The reason we want to import our my.local.machine cert into the local computer certificate store is because IIS does not run under your own user account, rather, it runs under a system account.

Once you see the cert store for the local computer, go ahead and import the my.local.machine.pfx file into the local computer's personal store with the default settings. Note that when you click import, the search window will default to showing .cer files only - you'll have to change the types in the bottom right corner in order to show .pfx files as well. 

Once the cert is imported successfully, you should be able to see it in the local computer's personal store. 

At this point, import your MyRootCert.cer file into the Trusted Root Certification Authorities for the local computer store as well so that all of your certs signed by MyRootCert are trusted by your computer.

Step 5: Set up the web site

Create a folder on your hard drive somewhere (mine is at C:\SSLSite) that will be the directory holding your site files. Inside of it, create a text file named Default.htm, edit it, and set the contents to just be 'SSL!'.

Now open IIS and create a new web site by right clicking on sites and clicking 'Add Web Site.'


Set up your site as the image below shows. Note that your physical path might be different based on where you created your site file directory. If port 443 on your machine is in use, feel free to choose another one that is not in use (for example, on my machine, it was, so you'll see future screenshots use 440 instead. Additionally, when typing in URLs below, you should only have to specify the port if you chose not to use 443).


Click OK when you are done filling out your settings, then open a browser and navigate to https://localhost:port/, where port is the port set in the binding section in the 'Add Web Site' dialog just above. You'll likely see an error message like the following:


This indicates that the certificate being offered is invalid. In Chrome, I continued on to the site, and once I clicked the x'd out lock icon by the https, Chrome told me that the server certificate is invalid because the server's certificate does not match the url. In this case, the server's certificate has a subject name of my.local.machine (set by the "CN=my.local.machine" when generating the cert), whereas the URL you're typing into your bar is localhost. Definitely not the same. Let's fix this! Move on to step 6.

Step 6: Match the URL to the certificate name

Open up the c:\windows\system32\drivers\etc\hosts file in a text editor. More info on the hosts file can be found here, but simple explanation is it allows you to map host names to IP addresses on your local machine. 

At the bottom of the file, add: 
127.0.0.1 my.local.machine

This will allow my.local.machine to resolve to the IP 127.0.0.1, which is the loopback address (read more here). 

We can test to ensure this is working by opening a command prompt (Win+r, cmd, <Enter>), and typing in ping my.local.machine. See how it resolves to 127.0.0.1?


Finally, head back to your browser and type in https://my.local.machine:port into the address bar, and that should eliminate any warnings and give you a nice, green https URL with a valid certificate. 


That concludes part 3 of this series. Keep this site set up, as in the future, we'll use this site to learn about client certificate authentication as well.

Sunday, June 1, 2014

Practical Certificate Knowledge for .NET developers: Generating Your Own Certificates

Generating Your Own Certificates


Last week's post was an introduction to practical certificate knowledge in windows. This week we're going to look at generating your own certificates as a learning exercise. 

Introduction

First, we're going to create a new root certificate using the makecert.exe utility. Remember, a root certificate is also called a self-signed certificate, as this is a certificate that isn't signed by another certificate (technically, it is signed by its own private key). Then, we'll install this root certificate into the trusted root certificate authority area in Windows. That means the generated root certificate will be trusted, and any certificate we create signed by the generated root certificate will be trusted. 

After that, we'll create a cert that is signed by the root cert and examine the trust chain for it. Lastly, we'll leverage the pvk2pfx.exe utility to create a .pfx (or personal information exchange) file that we can import into the personal certificate store. 

Also, one terminology piece to cover: you may have heard the terms 'valid' and 'trusted' when referring to certificates. Trusted means that you can trace the chain of trust of a certificate back to a root certificate that is trusted (in Windows, this means it's in your Trusted Root Certification Authority). Generally speaking, valid means that a certificate is trusted, is not expired, and is not revoked. I briefly touch on revocation at the bottom of this post.

Utilities required

makecert.exe: In order to generate a self-signed certificate, you'll need the makecert.exe utility for Windows. This utility ships with Windows SDKs, for example, I found it in C:\Program Files (x86)\Windows Kits\8.1\bin\x64 as well as a few other locations. You can find its official documentation here. I'll go over each flag we use with the makecert command, or you can refer to the official documentation.

pvk2pfx.exe: A .pvk file is a private key file. A .pfx file is a personal information exchange file, which contains information including certificates and private keys. These files may be password protected to ensure that even if someone accidentally sends out a .pfx file, they can't get to the private key without knowing the password. You can find the official pvk2pfx.exe documentation here.

Ensure you get these utilities directly from Microsoft. You wouldn't want to generate certificates with a tampered program, so you can verify the authenticity of your utilities by right clicking on them, selecting properties, and viewing the Digital Signature tab to ensure the utilities are digitally signed by Microsoft.

Generating a root (or self-signed) certificate

Let's generate a root certificate. makecert.exe is a standalone utility, so you can feel free to copy it to another directory to generate certificates in, along with pvk2pfx.exe. Your directory should look something like:


Open up a command prompt (Win+R, type 'cmd', press <enter>) and navigate to the location of makecert.exe. An easier way to do this might be to navigate to the location in windows explorer, then shift+right click in the directory and select 'Open Command Window Here' (note you cannot have any files selected when right clicking, or you'll get the file menu instead of the directory menu). 

We're going to run the following command, but before we do that, you can read about what all the parameters mean just below it.

makecert.exe -r -n "CN=MyRootCert" -pe -sv MyRootCert.pvk -len 2048 -b 05/21/2014 -e 05/21/2029 -cy authority MyRootCert.cer

-r: This indicates the certificate is self-signed (also known as a root certificate). 
-n "CN=MyRootCert": The certificate name. This must conform to X.509 standards - an simple way to do this is to start the name with CN=.
-pe Indicates the private key is exportable.
-sv "MyRootCert.pvk": The name of the private key file - one is generated if you do not provide one.
-len 2048: the key length. RSA claimed that 1024-bit keys were likely to become crackable some time between 2006 and 2010 (they were right - they were cracked in 2010) and that 2048-bit keys are sufficient until 2030. If you need further security, increase the key length. In fact, NIST, the National Institute of Standards and Technology, has stated that 1024 bit keys should no longer be used past 2013, so do not use them in a production environment. 
-b and -e with dates: the begin date and end date that the cert is valid. 
-cy authority: This value can be authority or end-entity. authority indicates that this cert can be used to sign other certs. end-entity indicates this cert cannot be used to sign other certificates, thus forcing it to be the end of a trust chain.
Finally, MyRootCert.cer indicates the name of the output file.

Alright, now that we understand what we're running, let's go ahead and run the command. The first thing that happens is the utility creates the private key file. When this happens, you'll be asked to set a password. What this lets you do is protect the private key file with a password if you so choose, so if someone gets the private key file, they still can't use it without the password. In our case, since we're learning, set the password to 'learning', or don't set one at all.


If you set a password, you'll immediately be prompted to re-enter it. Before entering it, take a look at your directory.


See the .pvk file? Your private key file has already been generated, and now the utility wants to use the .pvk file to sign the .cer file (hence this being a self-signed certificate). Since you password-protected your .pvk file, you have to authorize the use of it. Enter the password and click ok. 

Once again, look at your directory. You should now see the .cer file there. Go ahead and double click it. Now you'll see the following: 


You generated your first certificate, but it's not trusted yet. Let's also look at the certification path tab. This tab will let you trace a certificate's chain of trust back to its root certificate. In this case, we only see one cert, as this is the root - later, we'll see more for other certs. Also note the status field text - this will change once our cert is trusted.


Trusting the root certificate

We want to trust the root certificate so that any cert you sign with it is also trusted by your machine. In order to do this, we need to install it in the Trusted Root Authority Certificate that we looked at in last week's post. Go ahead and return to your certificate management console. 

Once there, right click on the Trusted Root Certificate Authority->Certificates folder, select "All Tasks", then "Import." Go ahead and hit next, then browse to find your MyRootCert.cer certificate, and hit next. Select the 'Place all certificates in the following store' option, and ensure the store is set to 'Trusted Root Certification Authority'. Hit next, then finish. You'll get a warning about installing the root cert. Read it over, and click yes - in a real world scenario you'll want to validate the information displayed is correct. Once the import completes, validate that you see the MyRootCert certificate in the certificate manager. 

Now go back to your directory where you generated the cert and double click on the cert again. You should now see the cert has some purposes, and the certification path tab should say 'this certificate is ok', which indicates that it's valid (meaning it's trusted, not expired, and not revoked - more on revocation later). 


Creating a certificate signed by the root cert

Let's look at a new command that'll generate a cert signed by our root cert.

makecert.exe -iv MyRootCert.pvk -ic MyRootCert.cer -n CN=MySecondCert -len 2048 -pe -sv MySecondCert.pvk  -sky exchange -b 01/21/2010 -e 01/21/2020 MySecondCert.cer -eku 1.3.6.1.5.5.7.3.1

Before running this, let's look at the new flags that are being used.

-iv: The issuer's private key file. Required to generate a signed certificate.
-ic: The issuer's .cer public key file. Required to generate a signed certificate.
-skySpecifies the subject's key type, which must be one of the following: signature (which indicates that the key is used for a digital signature), exchange (which indicates that the key is used for key encryption and key exchange).
-eku: Specifies the extended key usage (sometimes referred to as enhanced key usage). Extended Key Usage can set be server authentication (a constant value of 1.3.6.1.5.5.7.3.1) or client authentication (a constant value of 1.3.6.1.5.5.7.3.2). There are additional values for different purposes. In our example, we are generating a server cert, one of the uses of which is an SSL cert. 

Go ahead and run the command. You'll be prompted to enter a password. Enter 'learning' again for the password (then re-enter it when you're prompted for it again). Your directory should now contain a MySecondCert.cer and MySecondCert.pvk. Double click the MySecondCert.cer file and click on the certification path. You should see:


Note that you can follow the Certification Path back to the root certificate, and your new cert is already trusted, since it's signed by MyRootCert, which is in your Trusted Root Certification Authority. 'This certificate is OK' means that the certificate is valid (which if you remember, means trusted, not expired, and not revoked).


Importing into your Personal store

The personal store in the certificate manager should contain your public and private key pairs in order to decrypt messages sent to you that have been encrypted by your public key.

In order to do this, we're going to create a .pfx file. If you recall from last time, a .pfx file is a Personal Information Exchange file. This can be used to combine your public and private keypair into a single file, and import this into your personal store. See the official Microsoft definition below in the first entry.


We're going to use the pvk2pfx.exe utility to create the .pfx file. The official documentation for this utility can be found here.

This command will generate a .pfx file for MySecondCert.

pvk2pfx -pvk MySecondCert.pvk -pi learning -spc MySecondCert.cer -pfx MySecondCert.pfx

-pvk: This specifies the private key file to use.
-pi: This specifies the password for the private key file. In our example, I'm assuming you used the 'learning' password. If not, change the password in the command, or remove the -pi learning flag entirely if you did not use a password.
-spc: This specifies the public key certificate.
-pfx: This specifies the output file name.

After running this command, you should see a .pfx file in your directory. Double clicking it will let you import this file into your Personal store. Follow the wizard until you get to the screen where you enter the password. There are a few protection options here to ensure your private key does not get accidentally exported or used without your consent. In our case, let's keep the following configuration:


On the next screen, explicitly specify the Personal store (this is where the key should go anyways, even if Windows selects the correct store). 

Open your certificate manager. You should now see this cert in your personal store. 

Re-exporting the certificate as a base-64 encoded string

One more thing you may come across is the requirement to provide a certificate as a string of characters rather than the .cer file itself. In order to get this, head to your certificate store and export a certificate in Base64 format (if it is a cert in your personal store, do not export the private key). Once the cert is exported, go ahead and open it in notepad. You'll see -----BEGIN CERTIFICATE----- followed by the base-64 encoded string representation of the certificate, followed by -----END CERTIFICATE-----. You can now supply the base-64 encoded string representation of the certificate.

I now know that this format of a certifcate (between the BEGIN and END lines) is called PEM, or sometimes ASCII Armor, thanks to Maarten Bodewes. Thanks Maarten!

Revocation

Certificate authorities have the ability to revoke a certificate and publish lists of revoked certificates online. This means that if a certificate becomes compromised (for example, if someone steals a certificate's associated private key), the CA can add the cert to a revocation list. In order for a cert to be valid, it cannot be on a revocation list. If you write any code that checks the validity of a cert, ensure you check the revocation list instead. This can pose a challenge and security risk if you are working in an scenario where the server running the code to validate a certificate does not have access to the internet. You can read more on revocation on Wikipedia.

Conclusion

Alright, I hope that this post was able to teach you something about practical usage of certificates. I know there are probably still plenty of questions, like "how do I use these certs to secure a site?" and "how do I use these certificates in C#?", which I hope to cover in future posts.

One last note: ensure you now keep your .pfx and .pvk files to yourself. Don't share them with anyone. If someone gets a hold of your root cert and private key, they can present certs to you that you'll implicitly trust, which would be very bad news. If you want to be safer, clean up your certificate store by removing the MySecondCert entry from your personal store, and the MyRootCert from the Trusted Root Certification Authorities.